
Adding a calculation register
Before you create a Calculation register configuration object named Accruals, you need to create two auxiliary configuration objects:
- WorkSchedules information register
- WorkScheduleTypes catalog
The catalog will store work schedule types available in Jack of All Trades. The information register will define which days are working days, since the salary amount is calculated based on the number of days employees worked within the payment period.
In Designer mode
Let us create the catalog and the information register.
- In Designer, create a Catalog object named WorkScheduleTypes.
- On the Subsystems tab, include the catalog in the Payroll subsystem.
- On the Other tab, create two predefined work schedules: AdmininstrationSchedule and TechnicianSchedule (fig. 17.11).

Fig. 17.11. Predefined work schedules - Create an InformationRegister configuration object named WorkSchedules.
- Add two register dimensions:
- WorkSchedule. Type: CatalogRef.WorkScheduleTypes
- Date. Type: Date
- Add a register resource:
- Value. Type: Number, length: 1
- On the Subsystems tab, include the information register in the Payroll subsystem.
Then let us populate the WorkSchedules information register with technician working days in September.
In 1C:Enterprise mode
Let us create a work schedule.
- Start 1C:Enterprise in the debug mode.
- In the Payroll section, run the Work schedules command.
- Create 30 register records, one by one. For the WorkSchedules register dimension, select the Technician schedule predefined item of the WorkScheduleTypes catalog. For the Value resource, specify 1 for working days and 0 for holidays (fig. 17.12).
To optimize this task, copy the register records (on the More menu, click Copy, or press F9).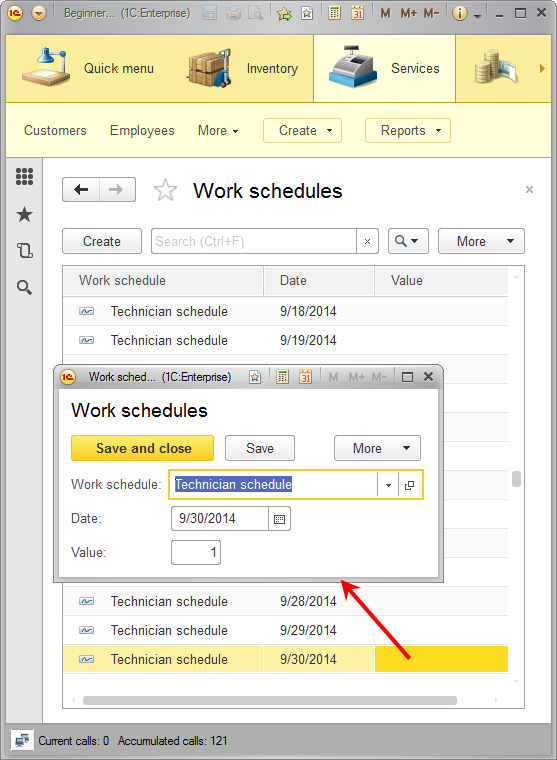
Fig. 17.12. Work schedules register records
Now you are ready to create the calculation register.
In Designer mode
Let us create the calculation register.
- In Designer, create a CalculationRegister object named Accruals.
- In the Extended list presentation field, enter Accruals register records.
- In the Chart of calculation types field, select MainAccruals.
- Specify that the register uses an action period.
- In the Schedule field, select the WorkSchedules information register.
- In the Schedule value field, select the Value resource.
- In the Schedule date field, select the Date dimension.
- Specify that the calculation register uses a base period and has the Month periodicity (fig. 17.13).

Fig. 17.13. Accruals calculation register editor - On the Subsystems tab, include the calculation register in the Payroll subsystem.
- On the Data tab, create the following items (fig. 17.14):
- Employee dimension. Type: CatalogRef.Employees, Base
- Result resource. Type: Number, length: 15, precision: 2
- WorkSchedule attribute. Type: CatalogRef.WorkScheduleTypes, link to schedule: WorkSchedule
- SourceData attribute. Type: Number, length: 15, precision: 2
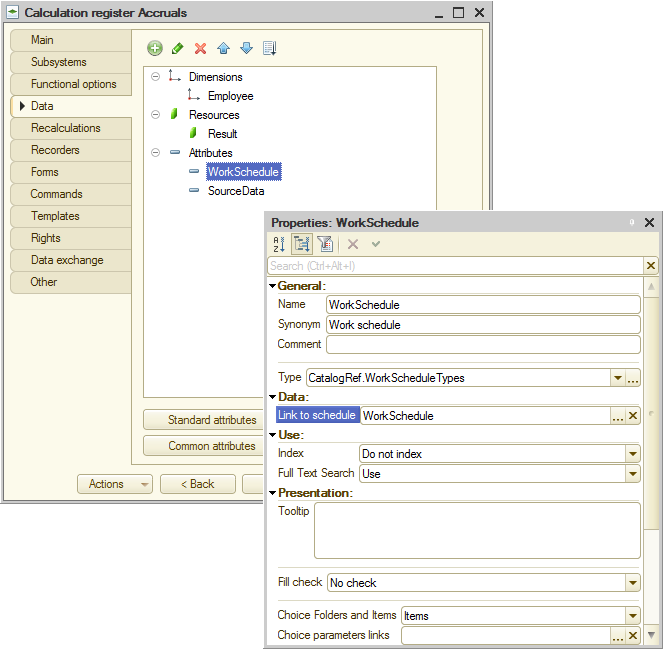
Fig. 17.14 Calculation register dimensions, resources, and attributes - On the Recalculations tab, create a Recalculation configuration object named Recalculation.
- For this object, create a single Employee dimension.
- For the Employee dimension, in the Register Dimension property, select Employee, and in the Leading registers data property, select the same Employee dimension of the Accruals calculation register (fig. 17.15).
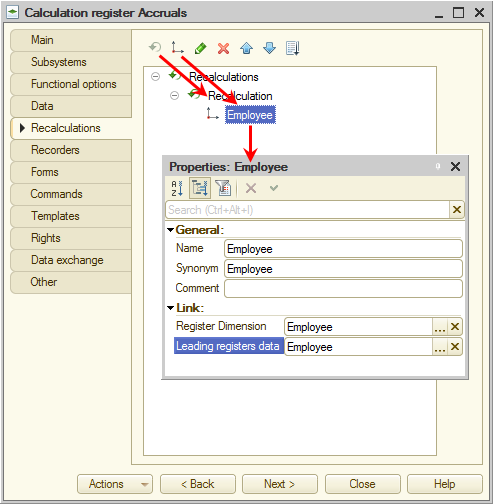
Fig. 17.15. Register recalculations
Finally, let us edit the command interface to make the command that opens the register records available in the Payroll section. - In the configuration tree, right-click the Payroll subsystem and then click Open command interface.
This opens the window that lists all commands of the selected subsystem. - In the Navigation panel.Normal group, select the check box next to the Accruals command.
This completes the creation of the Accruals calculation register configuration object.