NOTE: This page has been translated automatically from Russian to English. Original page.
An easy way to connect a barcode scanner without having to install drivers
In this article I will describe a way to connect a barcode scanner, which is used personally on many bases (mainly trade) and for different hardware configurations. This helps me a prepared set of files taken from the latest free drivers Athol.
It is assumed that you are familiar with the theoretical component of the interaction of the connected equipment and 1C, as too detailed description will be unnecessary.
So, step 1. Preparation.
To create the desired folder as the driver we need the last (or not so recent) free drivers from the company Atol. If you're regularly connecting the equipment, the more likely they are lying somewhere in a safe place.
My file is called so DTO6_2009_02_11_poslednie.7z
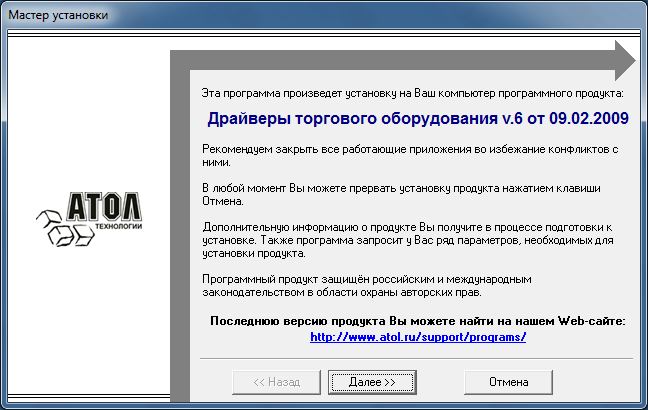
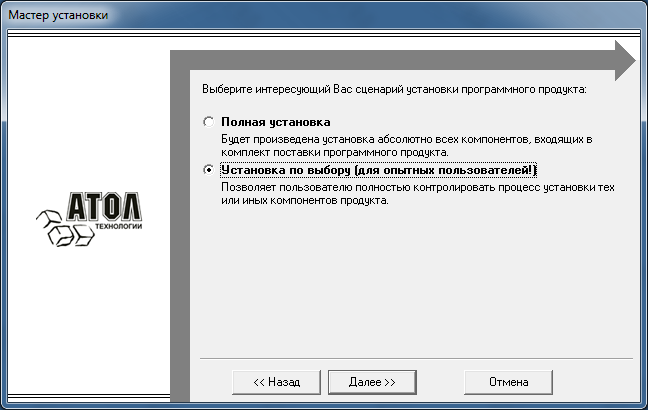
Initially, you need to install this package (then we'll get rid of it) to get from it the necessary files. Run SETUP.EXE and install just the needed program files (see. Screenshots). Do not forget to remember (copy) the installation path. More change nothing and click Next until the process is complete.
Go to the folder containing the driver (for me it's "C: \ Program Files \ ATOL ") and get to the folder \ Drivers \ Bin \, where we see all 3 file.

Copy these files to a separate folder, which can be called, for example, DrayverUstroystvVvoda.
In addition to this, save in a separate temporary folder the following files% WINDIR% \ System32 \ rtl70.bpl and% WINDIR% \ System32 \ vcl70.bpl.
After that, remove the newly installed driver, so that the system does not remain any trace of him.
Now try to run Scaner_t.exe file (File Scanner for testing) from DrayverUstroystvVvoda folders and get the following.
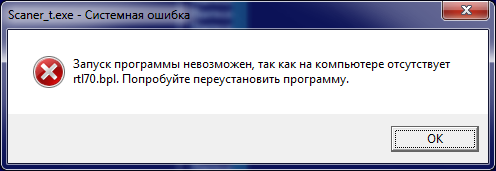
Rtl70.bpl move files from the temporary folder to the folder DrayverUstroystvVvoda. We try to run again.
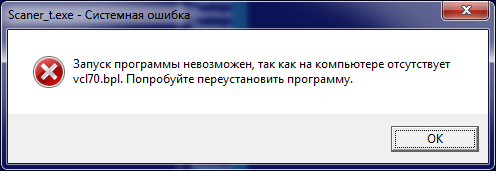
Similarly we proceed with the file vcl70.bpl.
Now when you start Scaner_t.exe we get quite a peaceful window with the proposal. The answer OK.
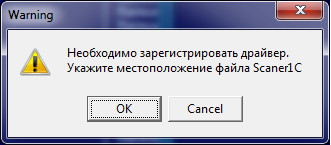
In the window (it will always be open by default in DrayverUstroystvVvoda folder), select the file and Scaner1C.dll witness the successful launch of a test driver utility.
Under Windows 7, do not forget to do the first run as administrator.
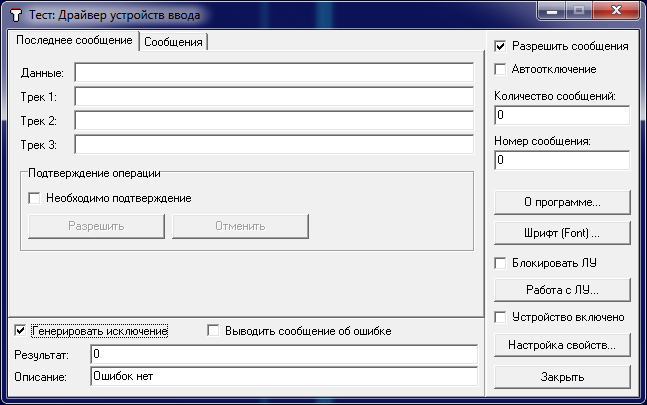
Step 2. Connecting the barcode scanner
So, we have a bar-code scanner to be connected to the user's computer. It does not really matter and mode of operation of the scanner connection port.
First we copy the folder to the target computer with the driver (I usually put it in Program Files). Then, open the folder with the driver, run the test utility (as root) and see the familiar warning about the need to register the driver. We agree, and we get a workable drivers on the target machine.
Now it's time scanner (it can be connected in advance or after driver registration). Open the test utility, click "Setting properties ...", then "Search for equipment ..."
If you scan a barcode in the window does not appear, then the equipment is set up properly (the reasons may actually be weight), and it must configure / reconnected / throw.
If the record came, then half way passed - the scanner successfully interacts with the driver, we do not have to go into its settings to find the necessary for further settings. These are the port speed (for devices connected to the COM-port, though, even he virtual) control characters suffix (in this case # 13, # 10) and sensitivity (for scanners in keyboard emulation mode).
Go to work together scanner and 1C. In my example, it will be managed at the UT 11 forms. In the conventional form, the process stretched for another service registration processing for the scanner.
Step 3: Integration with 1C
You must have a fish in water. Therefore, open the guide The connected equipment (Administrative Tools) and create a new element.
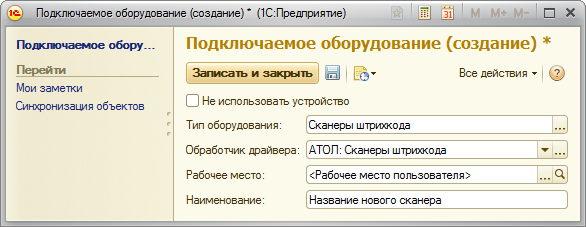
A settings window will open when writing this element to us. If it does not open, then the corresponding button (Set) is present in the form of a list.
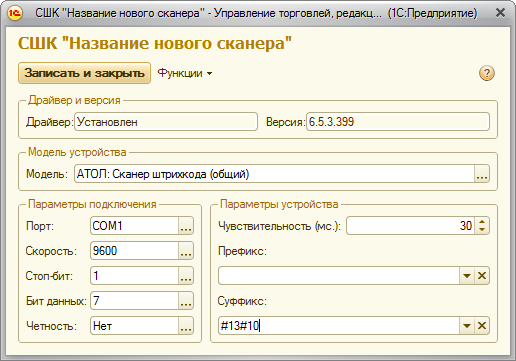
Here you must specify the correct port (or select the Keyboard), specify the connection parameters and sensitivity COM (keyboard emulation). Also, do not forget about the suffix, which we have seen in the driver's test. It must match exactly in exactly what the scanner passes.
On the side of the scanner configuration of the test is not available, so its performance can be checked in the directory Nomenclature.
RESULTS
That's the simple way we are forced to work without installing drivers free, and left for the ability of diagnostics on the user's computer.
Perhaps the description may seem long, but only at first glance. The entire connection process is reduced to copying a folder on the user's computer, run the test utility to test the scanner, and add an instance of the equipment with the installation of the known parameters in the environment 1C.
PS. Thank you for a wonderful product Atol.

