
Development tools
Development and operation of an applied solution are separate processes. Combining them may cause many issues for users, administrators, and developers (this is similar to changing tyres on a moving vehicle: the driver, the mechanic, and the passengers will probably all be unhappy with that).
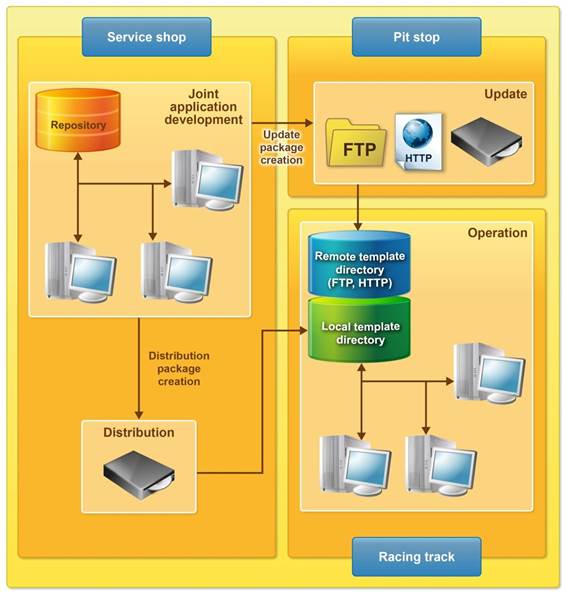
To simplify the modification of applied solutions, 1C:Enterprise features a set of tools supporting "hot mode" development and maintenance. This process may be compared to servicing race cars during a race. Changes are implemented swiftly and accurately in order not to impede or delay user operation.
We will review this process at the methodological level and reinforce the knowledge through exercises. To begin with, let us review the general procedure used to develop, support, and operate applied solutions in 1C:Enterprise 8:
We will use this procedure to practice developing, updating, and operating an applied solution during the whole course. We will start with the creation and installation (deployment) of an applied solution.
Development of an applied solution
First of all, we need to define what kind of a client application we will be creating. Since we are the developers, we will use the thick client as a client application for development.
We will use the thin client to interact with the database, except for cases when applied solution updates are required.
As we know, an applied solution requires a configuration. But what if we design our business application "from scratch"?
In this case the technological platform creates an empty configuration – a structure to be filled with initial settings later. We will also need an infobase for storing both data and configuration (which is the basis for our applied solution).
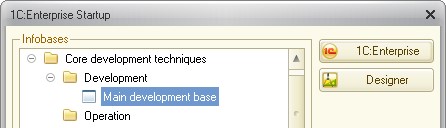
We will use separate infobases for development and operation. Let us place them into different folders in the 1C:Enterprise 8 startup window:

However, the option to create a folder is absent.
This is correct because the availability of this option depends on the infobase list display method. We need to display the infobase list as a tree:
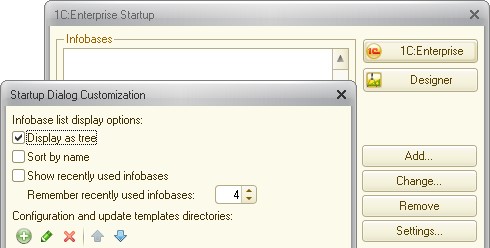
A hierarchical view icon appears in the upper left corner of the infobase list:

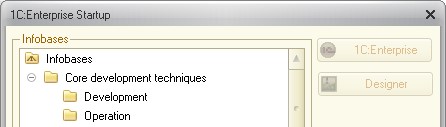
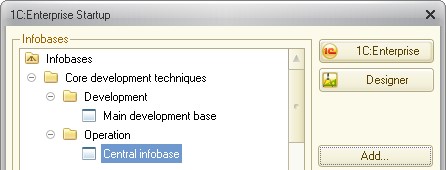
Let us create a folder called "Core development techniques", and two folders inside this group: "Development" and "Operation".
During this course, an end-to-end applied solution will be developed according to the diagram shown below.

The development consists of the following steps:
1. Design of the applied solution
2. Design of the applied solution delivery kit
3. Installation of applied solution templates
4. Development of the applied solution
5. Enabling group development
6. Development of an update for the applied solution
7. Updating the applied solution
Task 1. Creating an infobase for application development
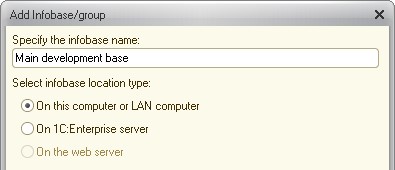
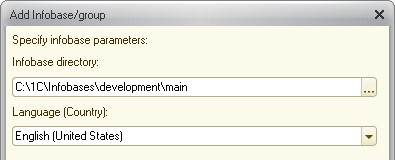
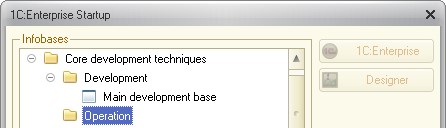
In the "Development" folder, create a file-mode infobase. Name it "Main development base" and place it here: "C:\1C\Infobases\development\main".
Solution
1. Select the Development folder, click Add, click Create a new infobase, and then click Next.
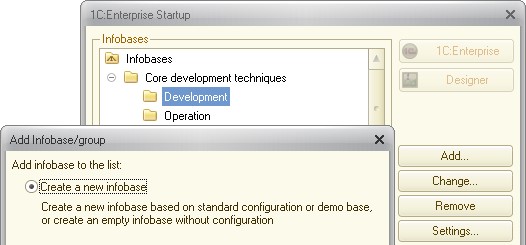
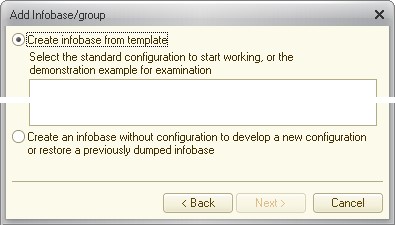
2. Click Create an infobase without configuration to develop a new configuration or restore a previously dumped infobase, and then click Next.
3. Specify the infobase name and location, and then click Next.
4. Specify the infobase directory and language, and then click Next.
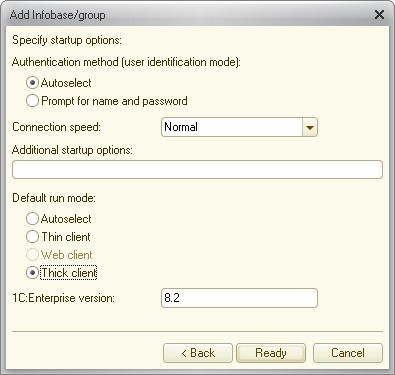
5. Select the startup mode (thick client) and the platform version (8.2), and then click Ready.
6. Verify the resulting infobase name and location.
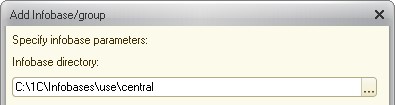
Task 2. Registering an infobase for application execution (without creating it)
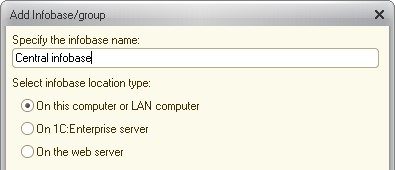
In the "Operation" folder, create a file-mode infobase. Name it "Central infobase" and place it here:
"C:\1C\Infobases\use\central".
Solution
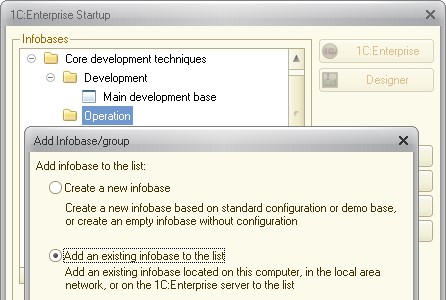
1. Select the "Operation" folder and click Add.
2. Click Add an existing infobase to the list and then click Next.
3. Specify the infobase name and location, and then click Next.
4. Specify the infobase directory and then click Next.
5. Select the startup mode (thick client) and the platform version (8.2), and then click Ready.
6. Verify the resulting infobase name and location.
Starting and customizing Designer
The "thick client" is the main developer tool. It allows you to use the following modes:
• "Designer", which is used for modifying and debugging the applied solution.
• "1C:Enterprise", which is used for data input and functional testing.
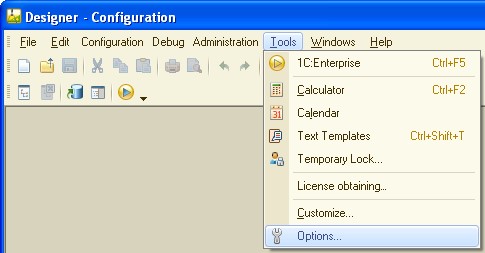
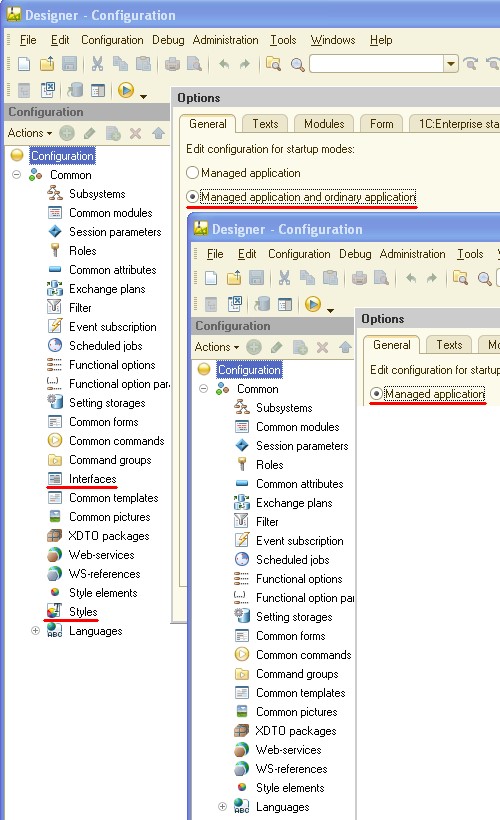
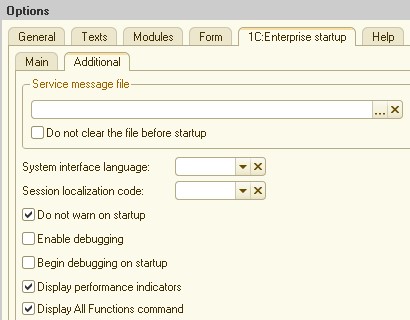
To customize Designer for your needs, on the Tools menu, click Options.
Pay attention to setting the application startup mode on the General tab (introduced in platform version 8.2):

It defines not only Designer appearance (for instance, the content of tabs in Designer settings),
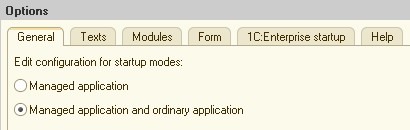
but also the availability of certain properties and structural elements of the configuration.
Designer includes an embedded text editor. It is one of the development tools, which is used for editing text documents and software modules of the configuration. It provides the basic text and software module editing functionality. 1C:Enterprise 8 Designer uses this editor in two modes:
• editing text documents;
• editing module script (as part of the form editor).
The Texts and Modules tabs allow you to specify text editor settings for these two modes.
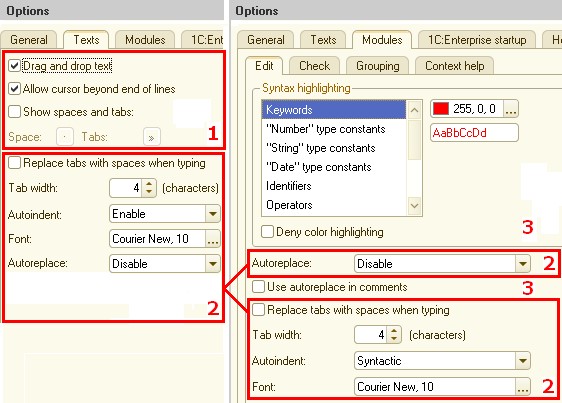
The figure shows which settings are related to text and script editing:
• 1 – text editing only;
• 2 – both text and script editing;
• 3 – script editing only.
The example below shows both editor modes:
• Script editing (for a common module)
• Text editing (for a readme file)
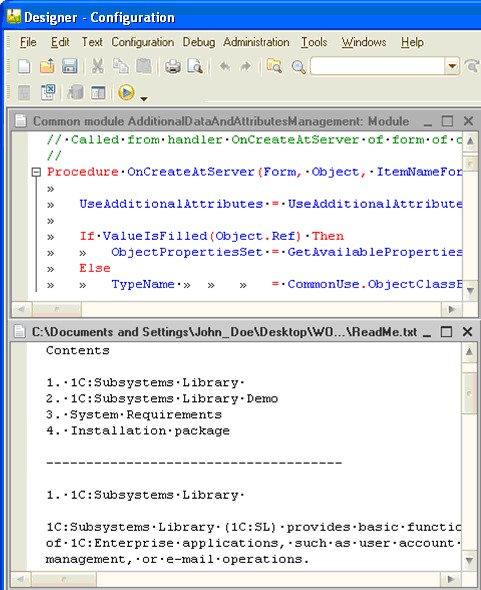
Text is displayed in different fonts in these two windows. Spaces and tabs are marked by special characters in both windows. Color highlighting is only enabled in the module editing window.
Distinct visual styles make text editing more comfortable.
Both text editor modes are described in more detail and with practical examples later in this course.
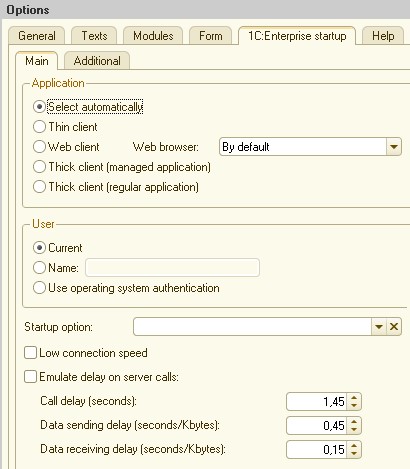
The 1C:Enterprise startup tab provides settings for starting applications from Designer.
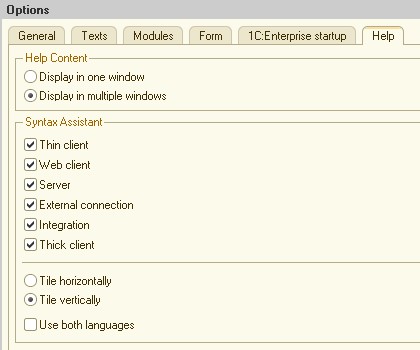
The Help tab allows you to customize the display and contents of the reference materials.
The menu bar and the toolbars are designed for enriched usability.
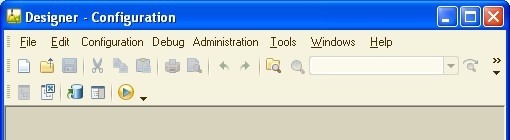
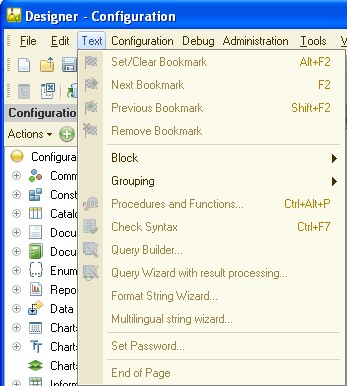
If a feature is not currently accessible, the corresponding menus are hidden, while toolbar commands and items belonging to these menus are unavailable. For example, the Text menu is only displayed while you are editing a text or script:
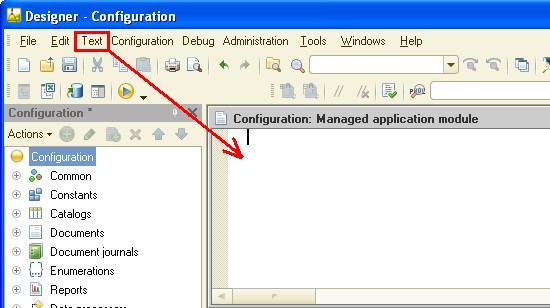
The Text menu is only available while the cursor is in the text editor window. Otherwise the Text menu contains unavailable commands.
Designer provides options for customizing the menu bar and the toolbars, as well as for creating custom toolbars:

To customize the menu bar and toolbars, on the Tools menu, click Customize.
To remove menus or toolbar items, drag them to the Designer work area while the Main menu setup window is on the screen. For example, you can remove the File menu, as shown on the following figure.
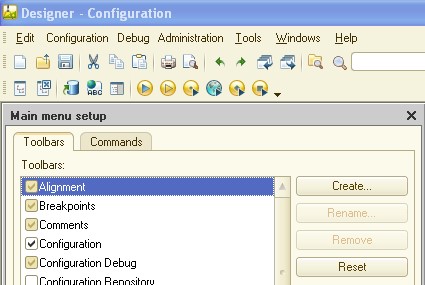
To restore the default view of the menu bar or a specific toolbar, in the Main menu setup window, select Main Menu or the toolbar name, and then click Reset.
To show or hide toolbars, on the Toolbars tab, select or clear the check boxes next to their names.
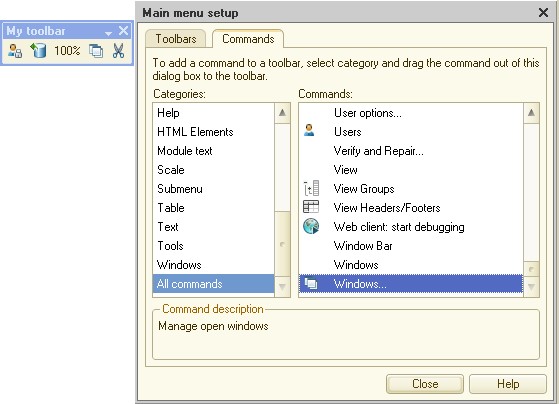
To add commands to a toolbar, drag them from the Commands tab to the toolbar.
To create a custom toolbar, on the Toolbars tab, click Create, enter the toolbar name, and then click OK. Then drag commands from the Commands tab to the new toolbar.
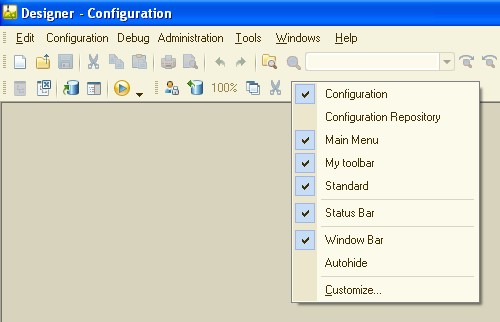
You have the option to show or hide toolbars using the shortcut menu in the Designer window:
For detailed information on interface customization options, see the embedded Help files:
Major developer tools
This section provides an overview of the major Designer tools. Their practical application will be explained with examples later during this course.
Let us start with some common Designer tools:
• working with files;

• service tools;
• pane customization;
• global help.
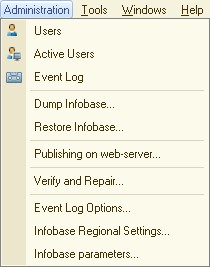
You can customize your applied solution using the following main menu sections: Configuration, Debug, and Administration.

The Configuration section allows you to work with the current configuration of the applied solution:
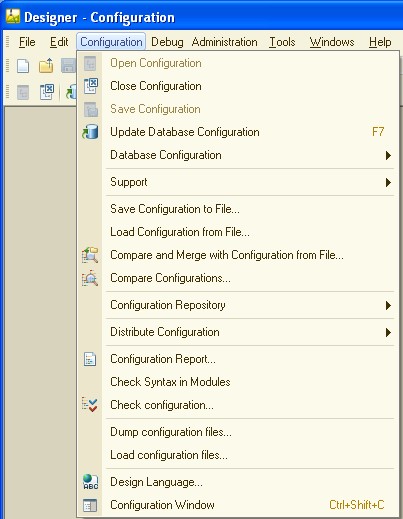
This includes the following functionalities:
• creating infobase structure;
• applied solution update;
• collaborative development;
• applied solution delivery;
• verification of current configuration;
• and other configuration-related activities.
Designer includes multiple wizards and editors for creating and modifying applied solutions. These will be reviewed in the exercises later in the course.
The Debug menu provides access to the tools that simplify development and debugging of 1C:Enterprise 8 software modules.
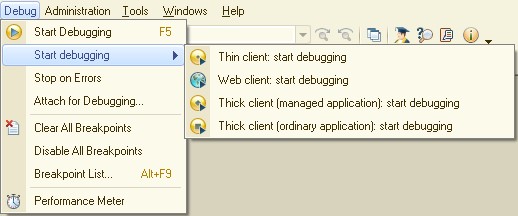
The debugger provides the following functionality:
• search and correction of algorithm errors;

• algorithm optimization for higher execution speed and reduced number of calls, and determining optimal place of execution;
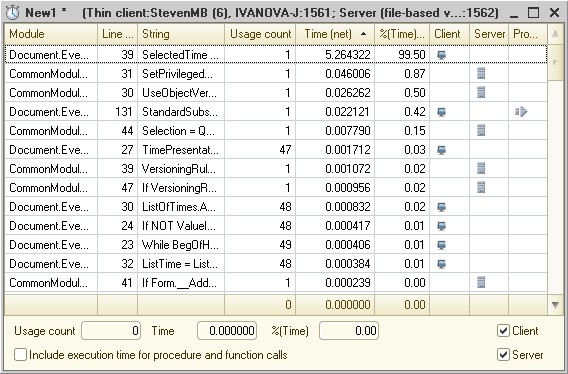
• extra algorithm-building functionality not covered by embedded text editors - for example, looking up values of parameters passed to a procedure or function.
For more information on the use of the debugger, see the corresponding sections of this course.
The Administration section provides access to the tools for administering the applied solution and the infobase (for both file and client/server modes).
Specific administration tools of the file and client/server work modes are presented as separate applications and are not included in Designer interface. For more information on these tools, see "Chapter 7. Service and Maintenance" in part 2 of this tutorial.
Interface Language of the Platform
The multi-language interface of the platform allows creation of applied solutions for users who do not speak English. In addition to that, developers can switch the platform to their native interface language during application development.
Once a platform interface language is selected, the following elements are displayed in this language:
• system menus;
• system dialogs;
• system messages;
• online help.
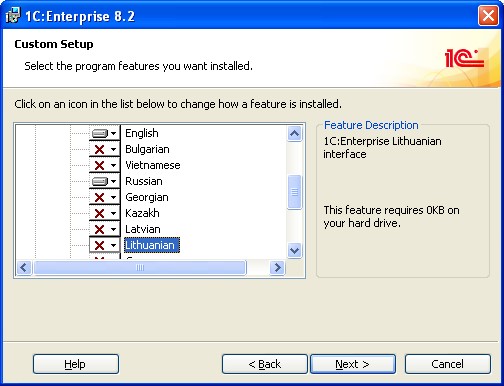
To be able to use an interface language, you have to install it from the platform distribution kit.
You have the option to select one of the available interface languages (for example, Russian) as a default one, which allows you to conduct development is this language:
You also have the option to select the interface language at the startup of the client application.
The language selected at the startup of 1C:Enterprise 8 does not limit the use of the infobase in any way. Multiple users having different interface languages can work with a single infobase simultaneously. You have the option to run multiple instances of 1C:Enterprise with different interface languages on a single computer.
The standard platform distribution kit includes the following interface languages:
• Bulgarian;
• English;
• Georgian;
• German;
• Kazakh;
• Latvian;
• Lithuanian;
• Polish;
• Romanian;
• Russian;
• Ukrainian;
• Vietnamese.
The localization of the Russian interface into other languages has been performed by 1C company in cooperation with a number of Russian and foreign companies.
UNICODE Support
The multi-language support in 1C:Enterprise is facilitated by storing all configuration and database texts in the UNICODE format. This format supports concurrent use of characters belonging to different languages in any text data. Therefore, the user can enter data in different languages (for example, if a product description or contract text should be stored in the manufacturer’s language). In this scenario, the texts are displayed properly, and both the search and sorting functions are supported.
Localization of Applied Solutions
In addition to selecting the interface language for standard platform commands, you have the option to specify different languages for forms and other interface objects that you create.
You can add multiple objects of Language type to your configuration.
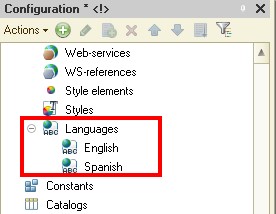
Since all configuration and database texts are stored in the UNICODE format, each text string can have multiple display options, one for each of the available interface languages.
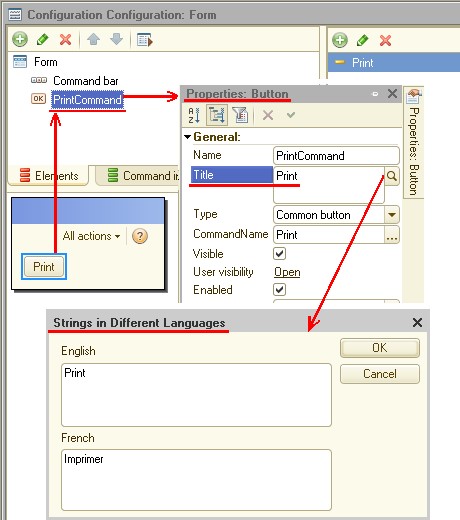
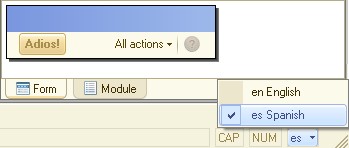
If you are creating a multilanguage application, you have the option to switch between the languages using a couple of clicks. This option is handy for form development because it allows quick switching between the form layouts in different languages, for example, English and then Spanish.
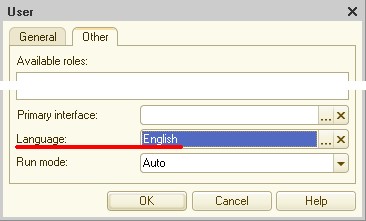
You can assign a default language for each user that has access to the infobase. The interface texts are displayed to each user in their default language.
Since the interface of an applied solution might be very large and complex, the platform provides a tool for editing interface texts.
The tool for editing interface texts is essential for localization of applied solutions. The most complex part of localization is finding the places where the text is to be entered in the required language. The interface text editing tool automates the finding and grouping of all occurrences of a specific string in the configuration and allows one-touch replacement or addition of this string in another language.
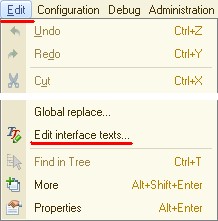
This tool is a part of Designer. To access it, on the Edit menu, click Edit interface texts.
The tool allows you to aggregate all interface texts so that you can quickly and easily specify their localizations into languages supported by your configuration.
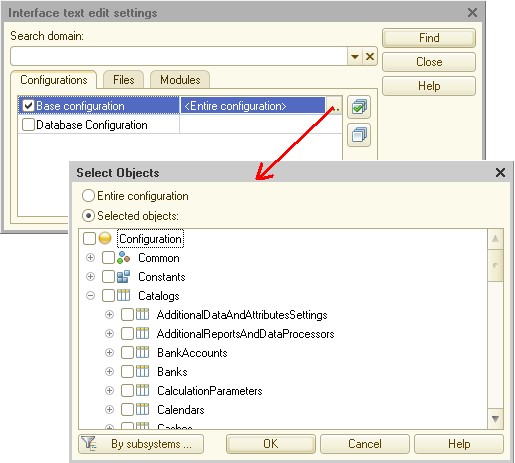
You have the option to specify the applied solution part whose texts you want to aggregate:
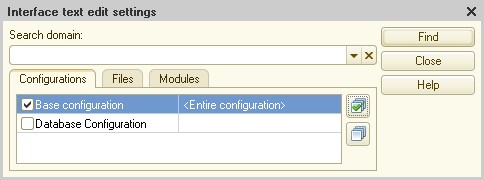
You can choose to search for texts in the entire applied solution, external files, open documents, or specific elements of the applied solution, such as a data processor form:
Search results are presented as a list containing the locations of text strings and their localizations to different languages.
For the purposes of convenience, you can collapse the list to hide the strings that are identical in all languages, or to hide the strings that are identical in a specific language.
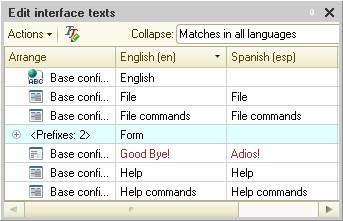
You can navigate to the element of the applied solution that contains the selected string with a mouse click, as well as edit string values directly in this list:
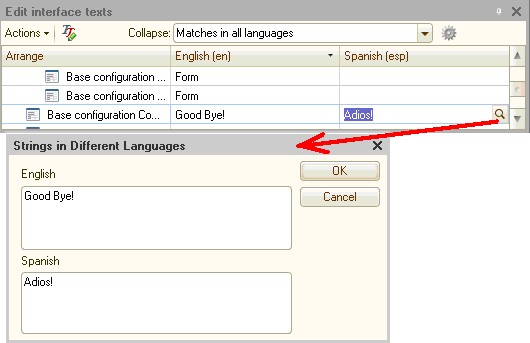
Localization to multiple languages is performed by specifying each string value in each of the languages.
Support of Regional Date and Number Format
Regional date and number display formats and text sorting rules are supported for all major European languages. You can configure your applied solution to use the regional standards of the countries that speak the given language. The infobase administrator can choose between the default operating system settings and their own custom settings.
Two Script Variants
The script is actively used in the development of an applied solution. You can use it to describe custom algorithms of your applied solution. All script operators have English and Russian versions, and you are allowed to mix
English and Russian operators in a single script fragment. You do not need to change any Designer settings for this; the Designer is capable of processing operators written in both languages. The Russian documentation and the Russian Syntax Assistant contain English syntax and synonyms for all script operators.
Internationalization Support in the Script
The script contains a number of functions that support internationalization:
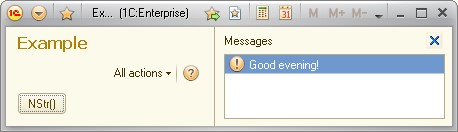
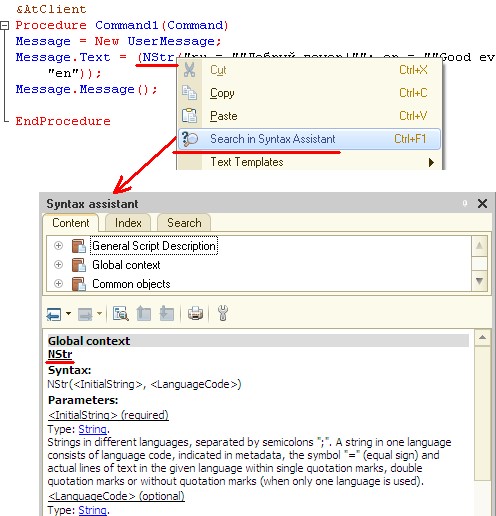
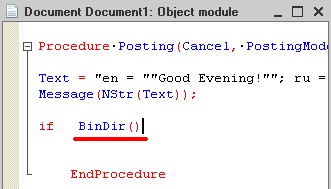
• NStr() — extracts the string in the required language or in the default language of the current user from a set of strings in different configuration languages. For example, executing the following code:
Message = New UserMessage;
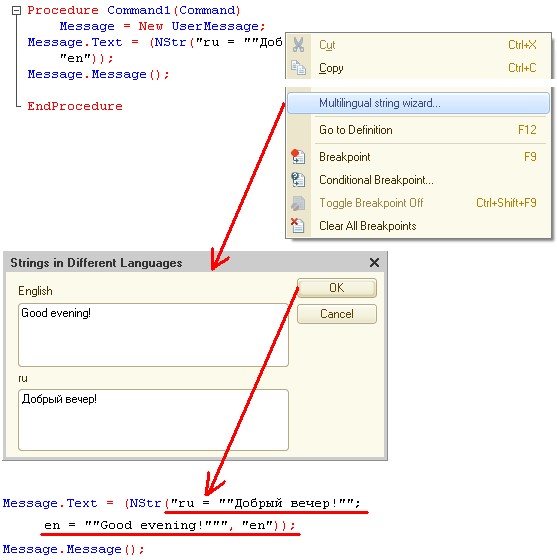
Message.Text = (NStr("ru = ""Добрый вечер!"";en = ""Good evening!""", "en"));
Message.Message();
results in displaying the following message:
To simplify the creation and editing of the string that goes to the first parameter of this function, the platform offers a multi-language string designer, which can be called using the shortcut menu in any module:
• PeriodPresentation() — generates a presentation of a time period in one of the languages supported by the platform. The period is specified by its start and end dates. For example, executing the following code:
CurrentDate = CurrentDate();
BeginOfPeriod = BegOfMonth(CurrentDate);
EndOfPeriod = EndOfMonth(CurrentDate);
Message = New UserMessage;
Message.Text = (PeriodPresentation(BeginOfPeriod, EndOfPeriod, "L=en_US") + Chars.LF + PeriodPresentation(BeginOfPeriod, EndOfPeriod, "L=uk_UA"));
Message.Message();
results in the following period presentation in English and Ukrainian:

Generation of period presentations is supported for the following languages:
• Belorussian;
• Bulgarian;
• English;
• Estonian;
• Finnish;
• Georgian;
• German;
• Kazakh;
• Latvian;
• Lithuanian;
• Romanian;
• Russian;
• Ukrainian;
• Vietnamese.
• NumberInWords() — generates a presentation of a number as text according to the specified template in one of the languages supported by the platform. For example, executing the following code:
CurrentDate = CurrentDate();
BeginOfPeriod = BegOfMonth(CurrentDate);
EndOfPeriod = EndOfMonth(CurrentDate);
Message = New UserMessage;
Message.Text = (NumberInWords(1457.25, "L=en_US", "dollar,dollars,cent,cents,2") + Chars.LF + NumberInWords(1457.25, "L=uk_UA", "гривня,гривнi,гривень,ж,копiйка,копiйки,копiйок,ж,2"));
Message.Message();
results in the following number presentation in English and Ukrainian:
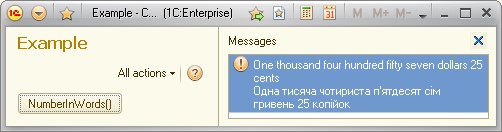
Generation of number presentations is supported in the same languages as generation of period presentations.
• Format() — creates a value presentation that is convenient for the reader. This presentation can use formatting standards of the selected language or country. For instance, presentations of Boolean, number, and date values:
CurrentDate = CurrentDate();
BeginOfPeriod = BegOfMonth(CurrentDate);
EndOfPeriod = EndOfMonth(CurrentDate);
Message = New UserMessage;
Message.Text = (Format(True, "L=en_US")) + Chars.LF + Format(True, "L=uk_UA");
Message.Message();
Message.Text = (Format(1475.25, "L=en_US")) + Chars.LF + Format(1475.25, "L=uk_UA");
Message.Message();
Message.Text = (Format(20010820105635, "L=en_US")) + Chars.LF + Format(20010820105635, "L=uk_UA");
Message.Message();
will look like this in English and Ukrainian:
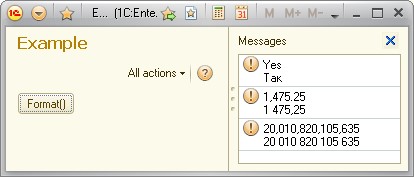
The Format() function allows you to generate value presentations based over 80 regional settings.
Setup Interface Languages
The installation program displays all of its messages in the language that matches the operation system regional settings. For example, if Latvian regional settings are used, it displays all of the messages in Latvian, and if English settings are used, it displays all of the messages in English.
The following interface languages are available in the installation program:
• Bulgarian,
• English,
• German,
• Latvian,
• Lithuanian,
• Polish,
• Romanian,
• Russian,
• Ukrainian.
The installation program allows you to install multiple platform versions on an end-user computer or on any other computer that runs a part of the platform (such as computers running server clusters or web servers).
On startup, the installation program automatically selects the interface language that matches the regional settings of the computer. You have the option to specify desired interface language of the installation program in its command line parameters.
Languages of Accompanying Files
The accompanying files that describe platform changes are provided in English and Russian languages.
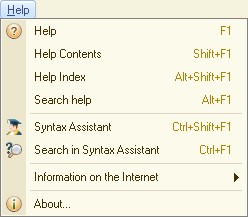
Syntax Assistant
The Syntax Assistant is a development tool that provides quick hints on script syntax while you are writing the script.
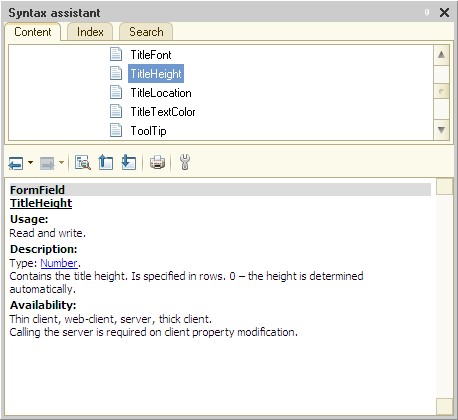
The Syntax Assistant is implemented as a part of Designer. It contains information on script objects, their properties, methods, and related events. At the top of the Syntax Assistant window, a tree view of a list of script elements is displayed. It includes operators, procedures, functions, system constants, and so on. For the purposes of convenience all the script elements are grouped by type in the tree branches.
For each property, method, or event the lower part of the Syntax Assistant window provides details on its syntax, parameters, and usage. The Syntax Assistant supports hyperlinks to descriptions of other script objects, which allows quick navigation to required information.
Selection by Context
The Syntax Assistant can display all available information, or just its part that is related to the selected execution contexts:
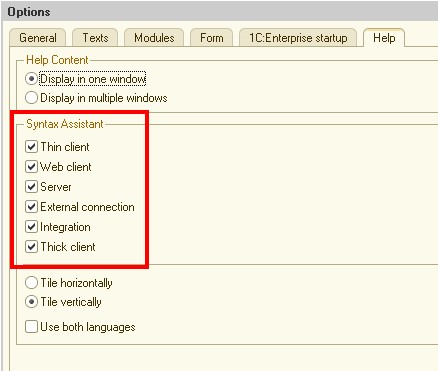
For example, you can choose to view only objects, methods, and properties that are available in the thin client.
You can choose contexts directly from the Syntax Assistant window. Alternatively, on the Tools menu, click Settings, click the Help tab and then select the check boxes next to the contexts that you want to use.

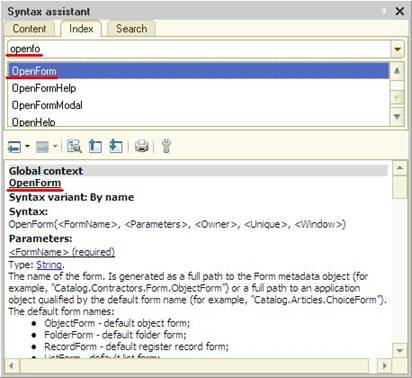
Search by the Beginning of a Phrase
The Syntax Assistant allows you to perform text search by the beginning of a string and then select the script object from the list of matching ones:
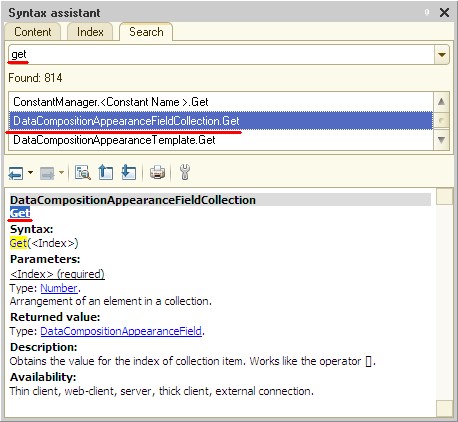
Full-Text Search
The Syntax Assistant supports full-text search. The search strings are highlighted.
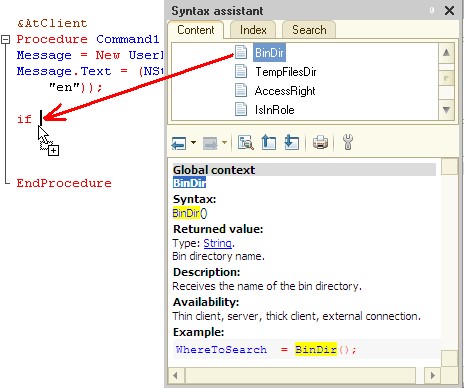
Context Help on Script Text
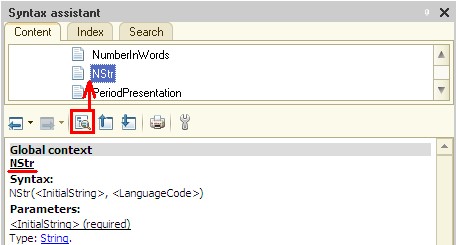
In the software module text editor, you can view the Syntax Assistant entry for any script element by moving the cursor to this element and then using a hotkey or a shortcut menu item.
Then you can use the Find current tree element button to open the Syntax Assistant tree for this element.
Inserting Script Blocks to Modules
You can drag script elements from the Syntax Assistant window to the module text editor.
This inserts a template of the selected method or function into the module.
Quick Help in the Properties Palette
In the properties palette, you can quickly access reference information on the selected method, property, or event using the shortcut menu.
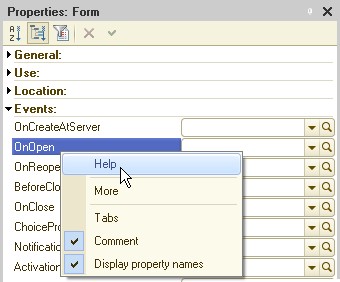
Note that this option is only supported for properties, methods, and events that can be accessed using the script.