Print form template
In Designer mode
Let us create a print form for the Services document.
- In Designer, open the configuration object editor for the Services document.
- Click the Templates tab, click Wizards, and then click Print wizard (fig. 8.1).

Fig. 8.1. Starting the Print wizard - On the first page, keep the default settings and click Next.
- Click Create new command (fig. 8.2).
By doing this you specify that the wizard will create the Print command that generates the document print form.
Fig. 8.2. The Print wizard, step 1 - Click the
 button (fig. 8.3) and click Next.
By doing this you specify that all of the document attributes will be displayed in the print form header.
Fig. 8.3. The Print wizard, step 2 - Click the
 button (fig. 8.4) and click Next.
By doing this you specify that all of the document tabular section attributes will be displayed in the print form.
Fig. 8.4. The Print wizard, step 3
Then the wizard prompts you to generate a footer (the bottom part) of the print form. - Keep the default settings and click Next.
The default settings specify that the print form does not have a footer. You actually do not need a footer in this form. The wizard proceeds to the next step (fig. 8.5).
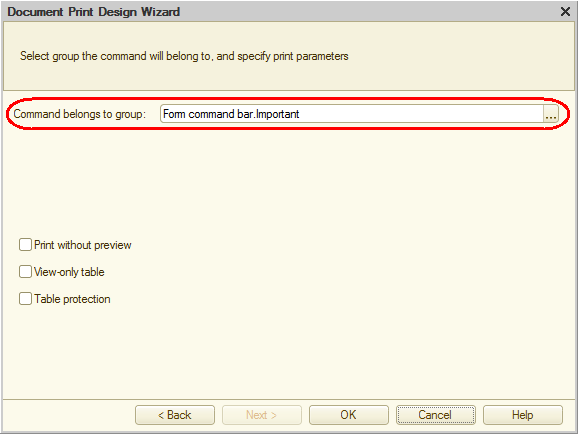
Fig. 8.5. The Print wizard, step 5 - Leave the default settings and click Next.
The default settings specify that the command that generates the print form is added to the form commands panel, to the Important section. - Click OK.
Designer opens the module of the Print command, the module of the Services document manager, and the template of this document (fig. 8.6).
Fig. 8.6. The Services document template
Note that you have the option to create a print form template, the respective command, and the button in the document form manually. But in this scenario the Print wizard does all the work:
- The print form template named Print is created for the Services document (see fig. 8.6).
- The Print command is created for the Services document. The module of this command includes a handler that calls the document print procedure, which is executed on the server. The print procedure itself is located in the Services document manager module (fig. 8.7).

Fig. 8.7. The structure of the Services document in the configuration object tree - The Print command that generates the document print form is added to the command bar of the Services document (fig. 8.8).

Fig. 8.8. The Services document form
Since the Print command belongs to the entire Services document instead of a specific form of this document, this command can be added to any form created for this document.
In the future you will create command handler procedures manually and add their respective buttons to the form but for now let us use the result of the print wizard.
In 1C:Enterprise mode
Let us test the template.
- Start 1C:Enterprise in the debug mode and open the first Services document.
Note that the document commands panel now has a new Print button (fig. 8.9).
Fig. 8.9. The Services document form with a new Print button
The Print button is also added to the commands panel of the document list form. This is handy because you do not have to open a document to print it. You can simply select the document in the list and click Print. - Click the Print button either in the document or in the document list.
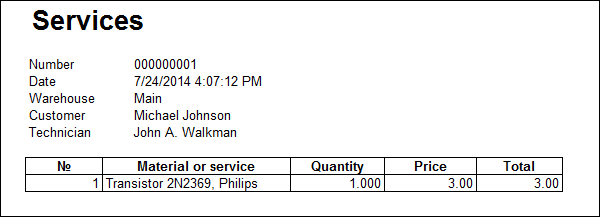
It opens the print form of the document (fig. 8.10).
Fig. 8.10. The print form of the Services document
As you can see, the wizard generated a perfectly usable print form. The only thing this form lacks is the total amount for the document. In the next section you will learn how to edit forms and templates of configuration objects on the example of adding totals.
