
Lesson 1-3
Using references instead of explicit values
Instead of entering warehouses’ names explicitly in GoodsReceipt documents we can store the list of warehouses in a separate table and use a reference to this table:
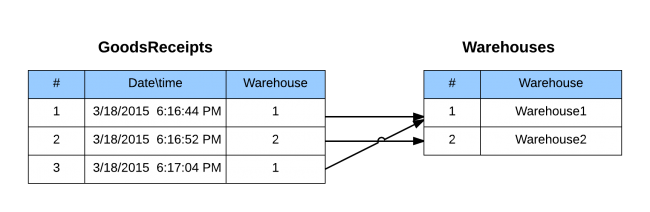
Now we can select the warehouse from the list, which gives us full control over the process of input and allows to exclude any possible mistakes. We also can easily rename the warehouse, speed up user entry and save some disk space (for the reference is usually shorter than a string name).
Unfortunately, this solution comes with a drawback: we need to think about maintaining the data integrity. Let’s see what happens if we delete one of the warehouses from the list:
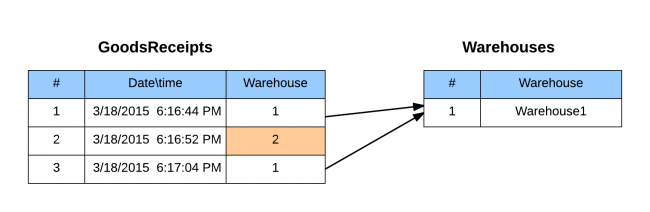
Now the doc #2 points nowhere so we just don’t know where these goods are. But here is some good news: the Platform knows how to take care of data integrity.
Creating the list of warehouses
What metadata object should we use for the warehouses list? The Platform has metadata type called “Catalogs” especially dedicated for the lists like that. You should use this metadata type for the list of objects with the following characteristics:
- The list can contain any number of items but the content is altered comparatively rarely;
- Every item has its unique reference and code.
Let’s create the Warehouse catalog and use a reference to it in GoodsReceipts document.
List of materials
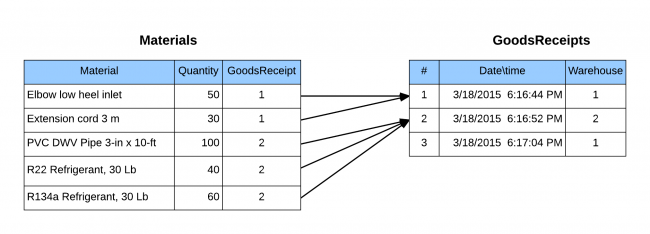
Every truck we unload contains a bunch of various goods, so we need a list of goods for each document. We could implement it in a form of separate metadata object like we did in warehouse case:
But there is a better option called “tabular section”. You can consider the tabular section to be a “table inside the attribute” (although it’s implemented in another way):
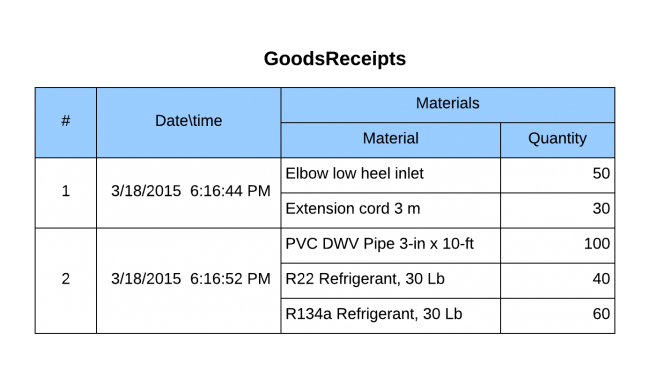
Let’s see how does it work.
Note that the tabular section is an integral part of an object it belongs to (“GoodsReceipt” document in our case). It means that you cannot address the tabular section independently - instead you need to deal with the entire object. For instance, if you want to add one more material into “Materials” tabular section, you have to read the entire doc in the memory, add a line and write the doc to an infobase.
Creating and filling up the Materials catalog
As you probably noticed we have chosen a string type for “Material” attribute of “Materials” tabular section. Obviously enough, we are going to work with the same materials all the time, so it would be better to separate their list into different Catalog as we’ve already done with warehouses. We also need to fill the new catalog with some data and to fill out the tabular part in our docs.
Let’s take a closer look at our list of materials we are using:
- Elbow W/ low heel inlet
- PVC DWV Pipe 3-in x 10-ft
- Extension cord 3 m
- R22 Refrigerant, 30 Lb
First two items are some plumber stuff, the third and fourth have something to do with fridge repair. Being in one list these elements look messy so why don’t we group them?
Grouping catalog items
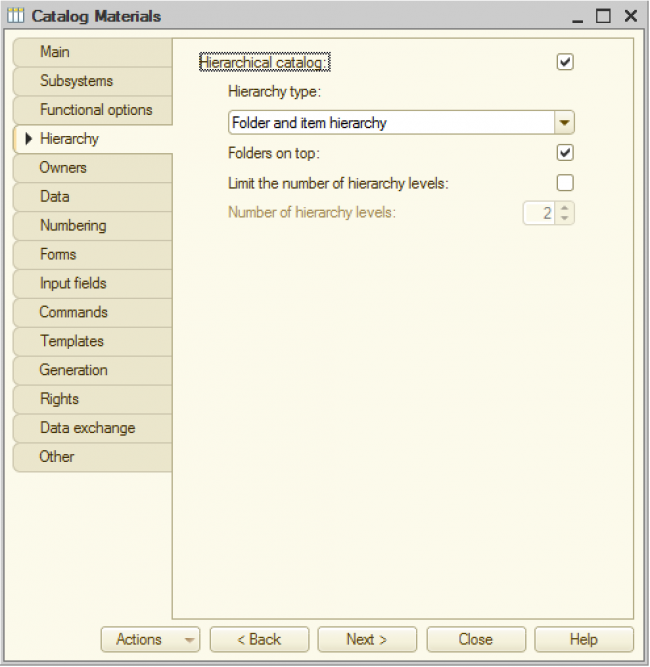
Any 1C:Enterprise catalog allows you to group elements in a hierarchical structure. There are two types of hierarchy:
- “Folders and items”. Quite similar to folders and files in Windows. You can create folders and then you can place catalog elements (or other folders) inside. This hierarchy type is for splitting elements into groups (like in our case - materials dedicated for different purposes).
- “Items”. You can place one element inside of another element making a tree-like structure. This hierarchy type is for elements that can be divided into smaller elements (like company structure (divisions, departments, units, working groups and so on) or geographical objects (continents, countries, provinces and so on).
After this is done there is a new action button in the catalog list form:

You can use it to create groups and that place the catalog elements into them by drag-and-drop.
Setting the default warehouse
Every time we create a new Goods Receipt we need to specify a warehouse. At the same time, in 99% of all cases we will be using warehouse “Main”, so it makes perfect sense to make this element chosen by default.
To implement this functional we need to change the form.
Creating a document form
As you might have noticed, we haven’t explicitly created any forms yet, but the application is fully functional. The thing is that the Platform creates all necessary forms at runtime basing on the metadata objects we specified. This forms can be modified to any extent by changing metadata objects settings and using 1C:Enterprise code.
Let’s explore different approaches to the automatic selection of the default warehouse and learn a few new things along the way.
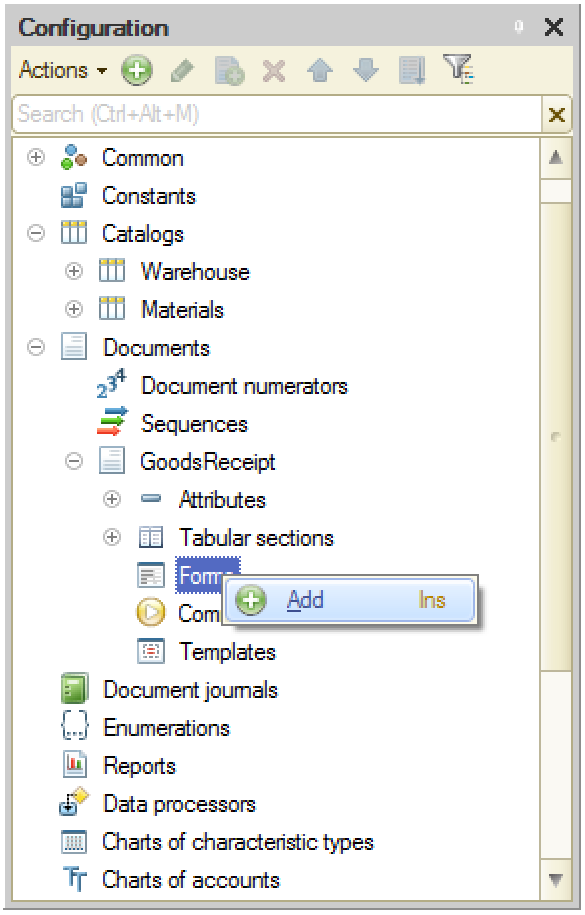
First of all we need to declare a document form for GoodsReceipts documents explicitly.
The Document Form Wizard is now open. First of all we need to choose the type of form from the following list of options:
- Document form. Displays all the doc’s attributes in one form. Used when you create or edit a doc.
- Document list form. Displays a list of all docs in a form of a table. Used when you browse through the docs to find the one you need.
- Document choice form. Another (usually more compact) list of a docs to find and select one when you need it to be used as a reference in another object.
- Generic. Empty form.
Consider these options as predefined templates you can use to create a form for further customization (and no, you cannot create your template).
Here is a video showing the process of the document form creation and giving an insight of the form editor basics.
Lesson 1-2| Course description| Lesson 1-4