
Lesson 4-2
Subsystems
After we do our best with this options, the working place still looks messy.
What happens when we have more than this seven links (which is always the case in real-world systems)? We definitely need some way to group the links. This is what the Subsystems for. You can consider the Subsystems to be folders containing the set of the commands.
These are “folders” I want to create:
-
Inventory
- Warehouses
- MaterialsAndServices
- BalanceOfMaterials (Totals)
-
People
- Customers
- Employees
-
Documents
- GoodsReceipt
- Services
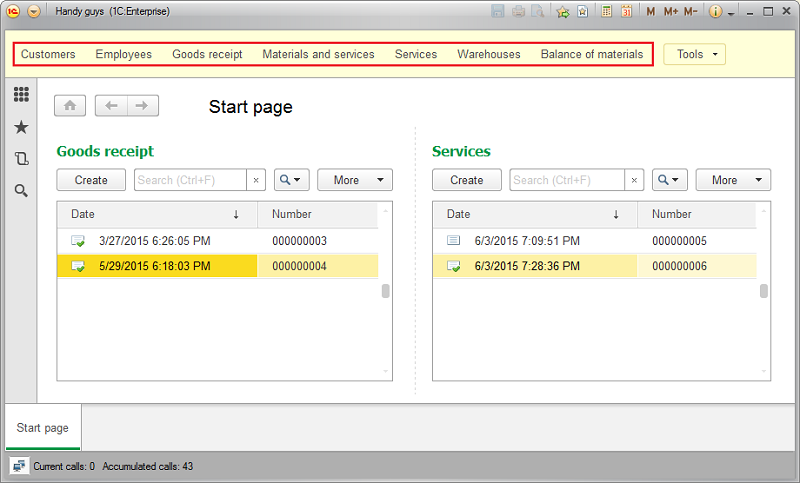
This is what our interface looks like by now:
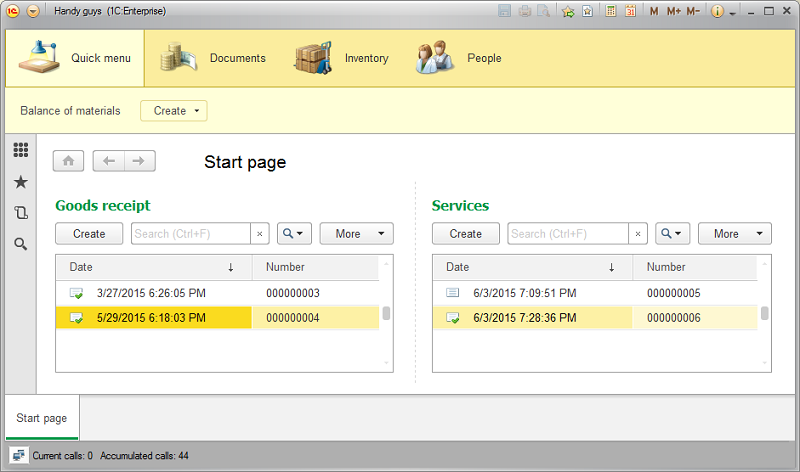
What if we, for instance, want to place the Main Section and Subsystems toolbar to the right side of the form? OK, let’s see how we can do that.
Panes
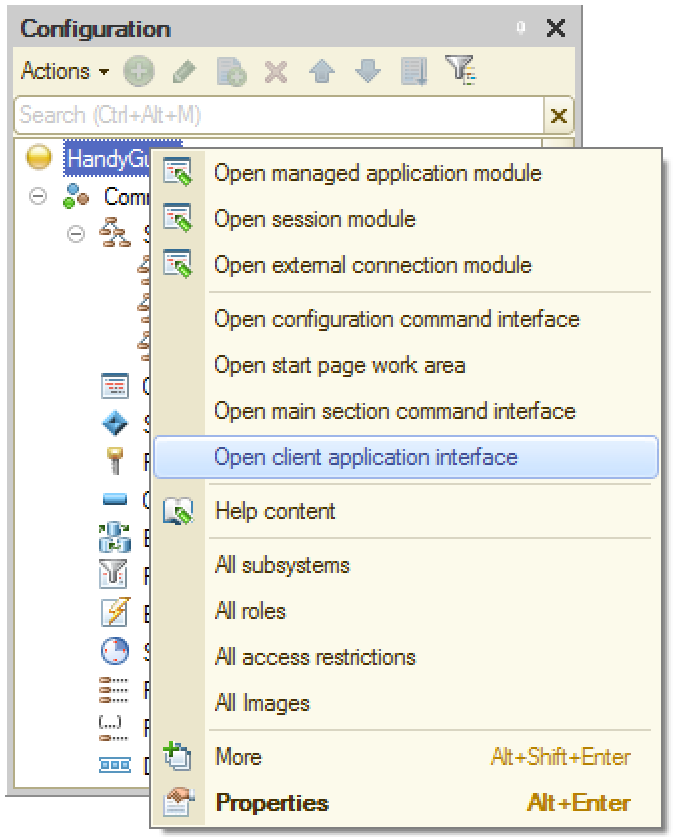
The Platform has six predefined panes that can be placed anywhere in the main form. The list of the pains can be obtained by clicking “Open client application interface” context menu item on the top of the configuration tree:
This is how it works.
Interface elements visibility and data access
Users are different. Some of them work in accountant department, others - in management or sales. They work with the same information and, therefore, share the same application, but they all use the different parts of its functionality. For example, a salesperson doesn’t need to see bookkeeping reports and a top manager doesn’t want to check the inventory or look up for a specific invoice.
So we want some interface features to be hidden from some users as a matter of usability improvement. On the other hand, we might want to prevent some users from seeing some information for security reasons. For example, we want nobody but top management being able to see company’s financial statements.
Trying to implement that kind of functionality we inevitably come to the conclusion that we don’t need to specify the interface settings and access rights for every user personally. There are groups of users that share the same job duties and, therefore, have the same interfaces and the same access rights.
These groups are called Roles.
Roles and users
When you create a new 1C:Enterprise application there are no roles or users in there by default. At this stage anybody can:
- Run the application without a password being asked;
- See any interface elements regardless of their significance;
- Have access to any data in the infobase.
As soon as you add a first user the situation changes dramatically. No more unauthenticated access to the application for everybody. From now on, anyone who wants to run the system needs to tell it who he is (i.e. specify his user name) and input a correct password. It applies to both modes the Platform runs in - the Designer and the 1C:Enterprise (user) modes.
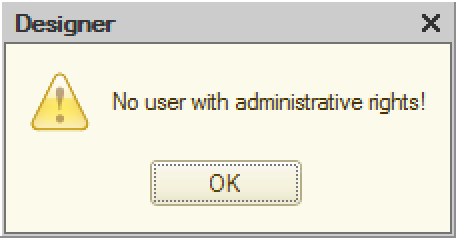
Therefore, it’s crucial that first user being added has administrative rights. Otherwise, you wouldn’t be able to run the Designer anymore (i.e. completely loose the access to the application). Good new is that you won’t be allowed to do so by the Platform.
If the first user you added has no administrative privileges, you will get the following error message:
How do we grant the administrative privileges to the first user? Let’s consider this scheme.
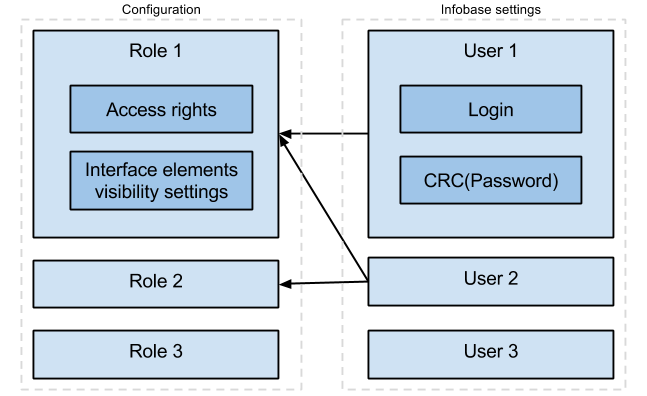
Here are a few important notes about this picture:
- Access rights and interface elements visibility settings belong to the Role (not to the User). Users get them by inheritance (when they are included in the correspondent role).
- Login and checksum of the Password belong to a User. There are no authentication attributes attached to a Role.
-
The role can (and will) contain many users. User can be included in any number of Roles:
- None
- One
- More than one
- Roles - are a part of an application, Users - are not. When you deploy your application somewhere, Users list won’t make it to the distributive.
- User password is not stored in the infobase explicitly. Instead, the Platform calculates and stores its checksum. The checksum calculation formula has no inverse function, so the initial password cannot be recovered if it’s forgotten.
So, let’s create the Admin role and the first user.
Access rights and visibility
There are two ways of hiding information from a specific role:
- We can make data invisible
- or we can deny access to data
These two methods result in a very look-alike user interface, but they actually work very differently and should be used for different purposes.
We make data invisible when we want to hide some information from some role for usability reasons temporarily. We believe that users of this role rarely need this data, so we don’t want to overload their interface with unnecessary detail. That said, users can always make this data visible again using various interface settings, so if they want they can see it.
We deny access to data when we want to prevent some information from being accessed (read or written) by some role for safety reasons permanently. We reckon that the users of this role have no business accessing this data and can cause some harm (deliberately or accidentally) if they have this access. Note, that when we deny access to some data there is no way user can get it by any means - data will be inaccessible no matter what settings, forms of 1C source code a user will try to get them.
Let’s see how we set up the visibility and how it’s different from setting access rights.
Lesson 4-1 | Course description | Lesson 4-3